Powershell – Check Exchange Log LUN Size

Posted on

So I haven’t been completely truthful with everyone up until this point. The truth is, my day job consist of a lot of corporate-like tasks since I’m a Systems Administrator. One of my many responsibilities is administration of an Exchange 2010 environment. I’m constantly being thrown curve balls and tasks that cause me to think outside of the Microsoft box. I’ve decided to branch out and share some of the problems and (more importantly) solutions that I’ve come up with. Hopefully these will help someone out there.

This is a problem we’ve been dealing with since day 1 with our Exchange environment. We have separate partitions dedicated to each database’s logs. Once and a while a client or end device burps and causes the logs to grow out of control and cause major problems for the database. We have a monitoring solution, however, that is even prone to issues once and while. The cure was a 2nd layer of protection in the form of the following powershell script. This script runs every 5 mins and reports the percent of free space remaining of each of the log partitions (luckily we named the partitions appropriately so filtering VolumeName for “LOG” was a quick fix). If the free space remaining is less than the configured threshold (20% in my case), an email/page is sent. Nothing too fancy, but definitely a handy little life saver. And without further ado – the code:

$mbxs = “[mailboxserver1]”, “[mailboxserver2]”, “[mailboxserver3]”
$maxthreshold = 20  # disk remaining percentage threshold.
$email_to = “[email_to_address]”  # where you want the alert email sent
$email_from = “[email_from_address]”  # where you want the alert email to come from
$email_smtp_server = “[your_smtp_server]”  # smtp server used to send alert email
$email_subject = “EXCHANGE LOG LUN SPACE ISSUE!”  # subject of the alert email
$email_body = “”

for ($i = 0; $i -lt $mbxs.Length; $i++){
Get-WMIObject Win32_LogicalDisk -Computer $mbxs[$i] | where {$_.VolumeName -match “LOG”} | foreach{
$server = $mbxs[$i];
$volname = $_.VolumeName;
$freegbs = [math]::round($_.FreeSpace / 1GB, 0);
$sizegbs = [math]::round($_.Size/ 1GB, 0);
$percentfree = [math]::round(($freegbs / $sizegbs) * 100, 0);

if ($percentfree -le $maxthreshold){
$email_body = “Server: ” + $mbxs[$i] + “`r Volume Name: ” + $volname + “`r Disk Size: ” + $sizegbs + “GB `r Space Remaining: ” + $freegbs + “GB `r Percent Remaining: ” + $percentfree + “%”
Send-MailMessage -To $email_to -SmtpServer $email_smtp_server -Subject $email_subject -From $email_from -Body $email_body
}
}
}

Arduino IDE Crashing on Windows 7 (64-bit)

Posted on

I just spent the last 3 days (on and off) troubleshooting why my Arduino IDE wouldn’t open properly on my Windows 7 64-bit machine. I thought I’d share the fix with the rest of the world as my Google searches returned nothing in the way of useful answers to my issue. For my issue, I’d click on arduino.exe and the splash screen would display, shortly afterwards, it would disappear along with the arduino.exe process that was running in the background. I had tried debugging the java launcher, that looked fine. I had checked permissions on the folder, flipped the compatability mode of the exe, you name it. In the end I needed to check the “disable visual themes” checkbox on the exe (see screenshot).

Full path to change this checkbox: C:path_to_arduinoarduino.exe > right-click >compatibility tab > check “disable visual themes”  (not a bad idea to check “Run as Administrator” while you’re in here) > OK

Hopefully this helps someone else out there as they desperately scour the interwebs for a solution to get back into the IDE.

arduino_exe_screen

Br-r-r-r-r-ing…It’s your Arduino

A recent comment by the009 got me thinking…I’ve been able to get Asterisk grab info about sensors connected to an ethernet-enabled Arduino, but how about the other way around? What if you could allow your Arduino to make outbound calls through your Asterisk system to make a make-shift alarm system, or over-powered doorbell? Well, wait no longer! Here’s how it works:

Asterisk: A php script lives on your Asterisk server (hosted up by apache) that, when it’s accessed, checks to make sure the client accessing it matches a pre-defined IP of your Arduino. If so, it creates a call file with the criteria that you configure to call a number of your choice and drops it in the Asterisk outgoing queue directory, triggering Asterisk to make a call. (I would highly suggest you only set this up on a server that doesn’t have port 80 open to the world!)

Arduino: The sketch code is easy…simply trigger a client connection to the Asterisk server when a button is pushed, motion sensor tripped, or ultra sonic range finder measures a particular distance (that part is up to you). As long as the Arduino’s IP matches the allowed IP configured in the php script, your phone should ring!

Make it happen:

  1. To get started, download the code and extract the files.
  2. Copy arduino-outboundcall.php into your web directory on your asterisk server.
  3. Next, add the lines from extensions_custom.conf (zip package) to /etc/asterisk/extensions_custom.conf
  4. Edit the variables at the top of arduino-outboundcall.php to match your configuration.
  5. Upload the sketch to your arduino, customizing to your configuration (of course!).
  6. Adapt it to your project!

Feel free to edit and manipulate this script to fit your needs, I just ask that you add a comment to this page explaining how you used it. Videos / pictures are always welcomed as well!

My Arduino’s love spans 80 characters

Posted on

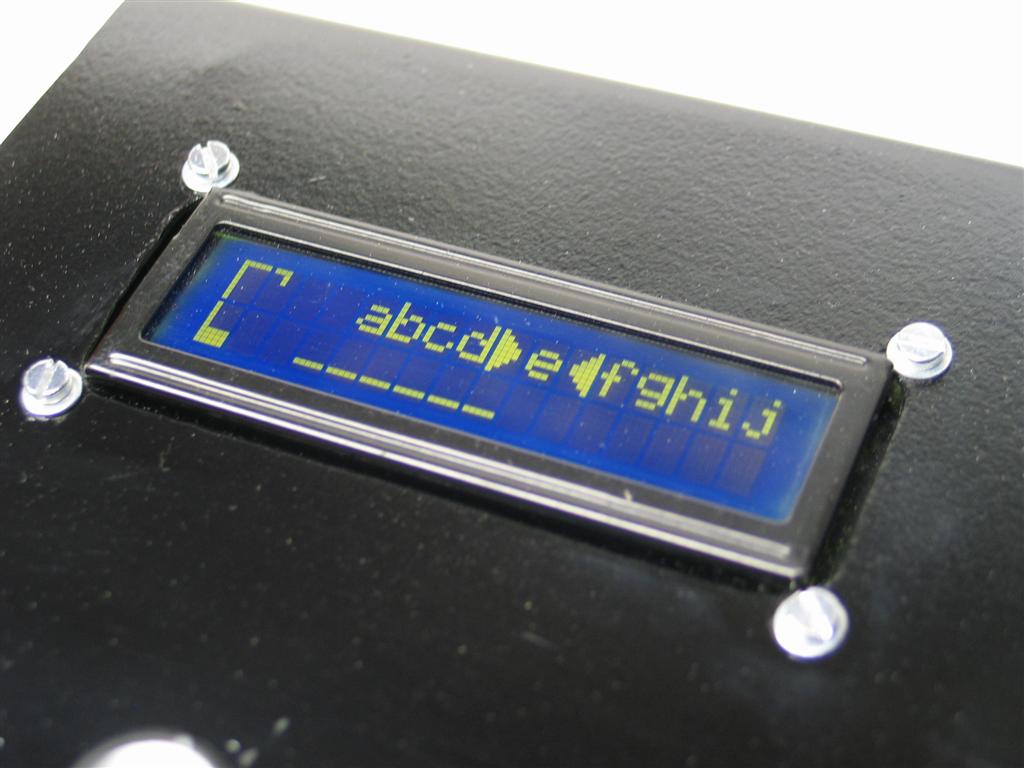
A good friend of mine is quite a bit like me in that he loves salvaging electronics. He works at a local cable provider that was throwing away a bunch of devices that had these nice 80 character (40 x 2) LCDs in them. He snagged them and generously gave three to me. This morning I decided to figure out if they used Hitachi HD44780 drivers as I suspected (16-pin interface). First I soldered up some pin header, snipped and wired the included ribbon cable and made this handy little breadboard adapter for easy prototyping. I had to make a few changes in my LiquidCrystal calls to make sure the library knew I was using a 40 x 2 LCD, and voila! Thanks again Yaffe for these awesome toys!

Bent SK-1

Bent SK-1

I wanted to share my nearly-completed SK-1 project. It still needs a back panel and some finishing touches, but it sounds amazing. I can easily get lost for a couple of hours just jamming on this little guy. It features an 18-point bend patch bay, 4 ground points, patchable potentiometer, joystick, and LFO, 8 additional hard-wired bend switches, drum kill mod, soft/hard reset, and a pitch bend (mounted on keyboard) with on/off switch. Now if only I could muster up some ambition to finish it…

SK1_6 SK1_1 SK1_2 SK1_3

Glitch LFO

Posted on
Glitch LFO

I’ve been wanting to get into circuit bending for a while now, but due to a jam-packed project notebook, it has taken the back seat…until now.

Music is my passion. I’ve played various instruments throughout my life and have always loved strange and exciting sounds and instruments. That being said, I’ve decided to focus my attention on music-making instruments / bends / circuits for a while. There’s something euphoric about mixing my love for music with my love for electronics…it’s hard to explain.

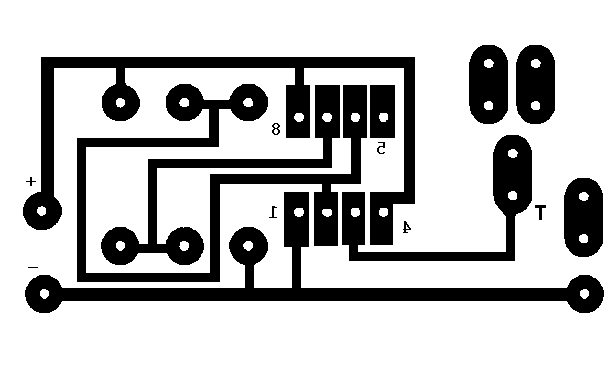
Seeing as I’m still a n00b at bending, I thought it proper to start with a staple bent instrument and see what I can do…enter garage sale find #1: Casio SK-1. As I started scouring the internet for ideas of bend points, and various different things people have done with the SK-1, I came across this really handy LFO circuit based on a LM555. I had all of the components in my parts bin, so I built it and started playing. The circuit itself is nice, but when applying it to any bend points, there was something missing. One of the changes I tried out was applying a PNP transistor to the trigger, so it acts as a switch that is being turned on and off to the speed of the timer. When I applied the bend points to either end of this switch, the results were very satisfying. I decided that for my bent SK-1 it would only be right to etch a PCB, so I made a quick change to the etch template and wanted to share that with everyone. I’ve also attached a few pics and a video of me playing with my SK-1 with this “glitch LFO”. I hope someone else gets some use out of it!

Download etchable circuit drawing here.

Hangmanduino

Posted on
Hangmanduino

Hangmanduino is complete! A word is selected at random from a list of 10 words. This could be set higher, but for demonstration purposes, it’s 10. The user scrolls through the alphabet to select a letter using the potentiometer on the front of the case. To select a letter, the user pushes down on the potentiometer. Schematics, pictures of the build and demo video can be found below…click here to download the source code, but keep in mind you will need to download the string library as well to compile this code.

hangmanduino_5 hangmanduino_4

DIY Push Potentiometer

Posted on

I’m working on a project that requires the use of two interface devices; a button and a potentiometer, but I wanted the look of the enclosure to be really clean. I was thinking about where to place the button and potentiometer, which is when I realized, it wouldn’t be too hard to make a potentiometer that could be pushed for the select function. Within an hour I had this little prototype put together. There are a few areas that need improvement, but overall, it works great! For materials, I used a spring, pot, tactile switch, and a couple of screws/bolts to hold it all together. It’s really simple to put together so I’ll let the pictures do the explaining. Feel free to post any questions in the comments section.

Oh, and thanks to Make Magazine for posting the pics from Flickr!

img_6091-large img_6098-large img_6100-large img_6101-large

Hangman prototype…

Posted on
Hangman prototype…

Hangman Prototype

A few months ago I was wrestling with getting my 16×2 parallel LCD to work with an Arduino for a few hours, until I decided it had to be broken. All I was getting was garbled characters and solid blocks. A few months later, I picked it back up and did some more playing, and eventually got it working. Now to learn how to print custom characters to it…I learn by doing, so I decided to make a hangman program. Below are pictures of the perf-board rendition of a shield for connecting the LCD, a few potentiometers, a tactile switch and a speaker for noise-making fun. At this point the code works well, but I’ve got some ideas for improvement and a box is in the making. Perhaps I’ll even submit it to Brico Geek “Let Arduino Play” contest : )

Arduino Web-based Live Gauges

Posted on
Arduino Web-based Live Gauges

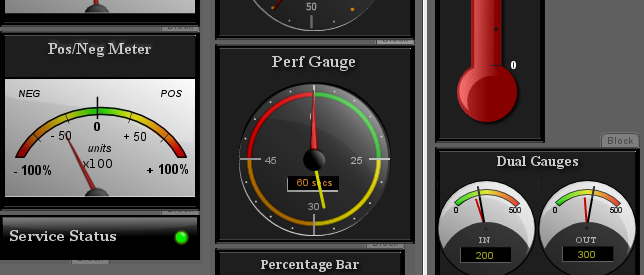
I needed some web-based gauges for my ArduinOil project frontend and I wanted them to be driven from PHP if possible. I came across Flash Open Gauges (FOG) written by Charles Nichols, which looked really slick and gave plenty of options as to the style of gauge and the methods that you feed it data. I started playing around with the scripts to customize them for my purposes. As I was learning about the feature of dynamically feeding the gauges data via PHP, I started thinking about how easy it would be to make the gauges live. A little tinkering, and voila! This won’t be particularly helpful in any of the projects I have going on at the moment, but I thought it might help someone else, so here’s how you’d make it work:

  1. You will need and Arduino (duh!), Ethernet Sheild, and some type of analog input device (potentiometer, photoresistor, etc).
  2. Go get the FOG files here.
  3. Download the demo scripts and sketch files I’ve created here.
  4. Extract the FOG into a folder on your server (can be either Windows or Linux, but must have PHP installed).
  5. Extract the demo scripts into the same folder as the FOG code on your web server and change the configurable variables in arduino_fetch_data.php to reflect the IP of your Arduino.
  6. Change the sketch code to reflect the IP you’d like your Arduino to have, upload the sketch and connect something to analog pin 5.
  7. Open the index.html in a browser by navigating to your server’s address.
  8. Read the FOG documentation and hack the scripts to do what you want!

I recorded a quick demo this morning of the script in action which you can find below. Also, keep in mind that I just threw this together on a side trail to a larger project that I’m currently working on, so there may be some refining that should be done to the code. I just don’t want to spend the time on it now, but if you need this functionality, it might be worth your while to poke at the code and try to improve it. Have fun!